Thursday, January 24, 2013

Project Life Week03

Hi everyone!! :)

I'm very happy to show the week 3 of my Project Life album today!!
I didn't think I'd love the Sea foam Edition as much as I do.
Turquoise is my all time favorite color and I almost never use it in my scrapbooks, but it seems like I really really like it now that I start using it. :)


My beloved small calendar found here: findingnana.com


Here, on the left picture, I wrote directly on my picture.
And for the other 2 pictures I used the orange arrows found in my old clementine kit.


(sorry for the blurry shot!) 

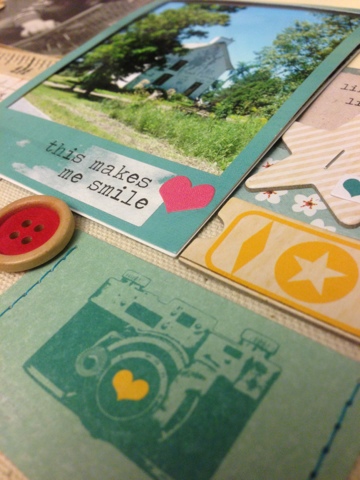
Here I stamped my title with some typewriter font from Inkadinkadoo and the ridinghood red ink from SU! I LOVE that color!! I wrote a little story about when school was closed last week. I found, as a Canadian, that it was closed for not much....about 2 inches of snow!!! So as I was building a snowmen with my daughter I was asking her why she thought the school was closed: it was mild, there was not much snow, the streets were nice..... and she answered: "Maybe Mrs. Heath (her teacher) wanted to stay home with Mr. Heath today?!" :)


Here is just a cute shot I love of my two little girls in front of our magnificent forest! :) Sometimes, there's not much to say about a picture. For those times, there are the cute little cards of the kit. :)


This week I used a new size of page protectors. I don't know the model of the page protector, it was part of a kit if I remember well. I bought those last year and never used them!
So on this page I have a 5x7 and 4 4x6.


The 5x7 pocket was perfect to add a card I got in a painting kit I used with Arielle this week. She used the card to mix together blue and yellow paint as she was learning to mix colors.... There's also a small version of the painting she was working on. That makes a GREAT memorabilia!!! I added to the card a small picture (3x4) of Arielle as she was painting. And I added some thoughts about the activity.... I used washi tape, tags, and some Heidi Swapp stickers and rub-ons.


For this 4x6 I used the template that I created for the 3x4 pictures but I didn't trim the pictures. On the white space left between the pictures I wrote down the story with a photo marker. Simple, simple!


Another cute shot.....I decided not to round every corner this year. In fact when I have a white border around the picture, like here, I leave the corners as is.


And in this pocket I taped together two 3x4 cards (with regular tape on the back...no fuss!). On one card I taped a posh-it note I found on my night table. Arielle did this. She wrote the numbers from 1 to 8... To anybody it could look like trash, but to me it's precious!! :)
And on the other card I used the "SEE" that was already on the card to create the I see you phrase with some stamps. I added a little heart from @HeidiSwapp and a small "liked" sticker, also from Heidi Swapp.

The last pocket is filled with a card taped to a 3x4 picture. Some words and that's it for week 3! :)


Before I leave, I wanted to show you a little something....

Here, In my album, right in front of every pages, I have a big envelop where I put a list of ideas I could photograph. I found the list on Becky's blog. That way, if one week I don,t have enough to say or enough photos, I can always add those ideas to my week. :)


And in front of that big pocket I have another page protector which is holding my small calendars that I didn't cut yet. :)


Oh and one last thing! Next to my album, I have my Project Life notebook. Yes, same color as my binder!! ;) It's a Martha Stewart notebook found at Staples. Inside....


Inside, it's not pretty! But it's useful information!!! :)
On each page I wrote the dates and the week number. 
And I draw my page (the pockets) and I write more or less what I want to add to my album - photos AND stories!! Sometime, I will write a story directly on a card and add it immediately to my album, but at the end I'll probably have to move it, or maybe even take it out, so I better like to write it in my notebook first. :)


Are you doing Project life too?? Sharing it online? If so, I'd love you to leave me a link so that I can come and see. :)

Have a good one!!!
Marie :)


Tuesday, January 22, 2013

playing catch up!

Hi there! :)

Ok, as I was looking to see how many datas I lost from our computer crash, I went through all my scrapbook pages I made since september and I doubled check on the blog to see which one I had shown you already and I realized that a couple of them are still not online!! :)
So that's fun! I get to show them to you now. :))

So, where do I start??

Ok, I don't know if I told you that I was trying to get Arielle to sleep in her own bed?? Well, I had to make a page about goal setting over @getitscrapped and I thought instead of choosing several goals like I did here, goals that I didn't achieved by the way!, I decided to choose ONE SINGLE goal this time and to go for it!! With a system in mind. What's a goal without steps to get to it right??! And anyway, this whole thing about Arielle not sleeping in her bed seemed like a beautiful challenge and a beautiful goal to set!! So I met a girl, a friend of a friend, who told me all about how she bribed her daughter and how her daughter started to sleep in her bed. Bribing right?? Ok, why not.....

So I made a calendar (it had to be cute because i knew it was ending in my scrapbook!) and I talked Arielle into it: every time she would sleep the whole night in her own bed, she'd get something that we chose before going to bed..... The first night, Arielle decided we would go to TCBY for frozen yogourt after school. The second night, she wanted to unwrap a present...... we ended up buying a pink Christmas tree for her bedroom, and so on. So on the calendar, I stamped and wrote the little things she wanted. When we were done (it only took 5 nights!! I thought that would go on for weeks!!!) I wrote the story of how I decided to to choose this goal and I stamped a quote saying that when we have a goal, half of the way is already done. :) Oh yeah, on the left page, I have a word art that I created the very first day I decided that this would be my goal. I wanted to frame it and put it on the wall but I didn't have time to do so. :) So here's the page:


Under my word art I've noted the date I've set by which my goal should be obtained:


And here is the journaling:


The calendar with the rewards:


And the quote:


Setting that goal and recording the processing of getting it done was fun!! :) 
And looking back at it, I'm very happy I did it! I've put the layout in my Project Life album. 

Oh, and speaking of Project Life, I read that the Paperclipping podcast is all about Project Life!! It's with Becky Higgins, the creator of Project Life and Elise Blaha Joy, the designer who made the seafoam edition that I am using in 2013, so if you are interested in knowing more about it, come listen!! I'll probably listen to it tonight. :)) Looking forward to that!

Have a good one!!
Marie


Saturday, January 19, 2013

Oh no!!!!

Hi guys!
I'm writing to you directly from my new hiding spot.....
I have received a bad news yesterday.

Pat to me:"Marie, do you use your folder Marie-Pierre on the computer?"

....

I have to tell you that our computer died on us last week. Lucky enough, the picture had been made and we "only" lost one week worth of pictures..... But, my Marie-Pierre folder, the one where I stock EVERYTHING scrap related from digital work I do to photos I took of my pages to products download, has apparently not been backed up since September.....because Patrick is doing the backups and because he didn't know that I was using this folder. So....

The good news is that Patrick could fix the computer yesterday night (the rams were the problem) and although I lost lots of things, we have a working computer again! Ouf!!

Have a nice week-end everyone! :) I'll be back probably Monday with some new pages. :)

Marie

Friday, January 18, 2013

PL- week2

Hi everyone!
I'm happy that you are back! :)

Before I show you my second week of Project Life, I'd like to show you where I make my album.

This year I decided to give my album some place! I cleared my scrap table and I will let my album lay there the whole year (I'm sure it will get covered with stuff from time to time, but in general, I want to be able to tuck journaling cards in the pocket at any time, when I feel like it and when something happens!)

Here's my set up:


Here's my scrap room. :)
It's in a "supposed to be formal dining room". Since we rarely have complicated guests (we never had actually!) we didn't feel the need of have a formal dining area. And I was very happy to have a whole room to myself. These are my two tables. On the right one, I scrapbook. You can see the supplies I use more often sitting on my table. On the second table, I have my dear sewing machine (you have to have it out and ready to use if you want to use it!!) and now my Project Life album next to it. 

Here's a closer look to my scrap table. Maybe I'll make a blog post some time about my scrap room, we'll see. :)


And to my now Project life and sewing table:


Ok, and now on to my 2nd week:


This is a journaling card from my previous kit: Clementine.


And so are these.


Here I used again my Photoshop template to make my 3x4 photos but I didn't separated them. I also added some text to one of the photos.


This is my weekly insert. :) I love this drawing!!! I added some details to the drawing: those are the words Arielle used to describe the drawing to me.


On the back of the drawing I inserted a photo montage. We went to the restaurant this weekend and Arielle drew a picture of me and her daddy. I unfortunately (and stupidly!!) left the drawing on the table and since i was so sad about that (because I had the perfect place to insert it in my album, obviously!! grrr!) I decided to make a kind of cartoon with all the pictures I took of here while she was drawing it. :) It's almost like I had the drawing back...almost! note to self: never leave a drawing behind ever again!!!!!


lol, ok, here's my table before cleaning (meaning after a project!!0 and after cleaning. ;) Who would have thought, right?! lol


Here, some more writing directly on the picture and some Photoshop work. I like both. they are different.


An Instagram with some journaling.


And some perfect and very lovely shot of REAL LIFE as it happens. :) Arielle was sick! 


And so ends the 2nd week. I'm now working on week 3, as time goes, slowly...... :)

Hope to see you again soon for some "real" and traditional layouts!

See you!
Marie

Thursday, January 17, 2013

Project Life - to a new beginning!

Hi everyone!

It's no secret: I LOVE PROJECT LIFE!!!
I'm doing it religiously (without skipping one single week!) since 2 years and I just started my 3rd year this week. :)

I haven't posted my project life album very often though because there was no response to those posts and I'm often thinking why should I bother posting if nobody reads it.... But this year I already heard of some people that are eager to see my album unfold so I'm going to try and post them more regularly...or, well, post them! :)

So here's to my new album! Project Life 2013!

First off, I chose the Seafoam edition for this year. I did my first year with the Amber edition, my second with the Clementine edition and I was very happy to receive my core kit yesterday and to order my binders today. Let me first present you the cards:


Nice, right?! :)

Ok, but first I started my album without the kit.....
So here's my cover page:


All those pictures were taken at Christmas. I included one family shot, a sweet sister's love shot and a head shot of each of us. 

I then added a postcard like card with our names and ages at the moment.


The card was left over in my Clementine kit from 2012. I made myself a family die-cut using my Silhouette: I used the couple and I cropped and resized the woman to create Arielle and Maya and I positioned them next to me. I cut them in some "decoupage paper". I'll soon make a blog post on that kind of paper. I aded a stamp-like sticker from simple story and stamped a stamp-like stamp twice on it. Oh, three times actually. :) I added in my own hand writing "right now..." next to the this is life in the bottom left corner of the postcard.

I wanted to include the date in the page and I wanted it to be BIG! lol 
So I used again my Silhouette and some stencil font that can be found either with the silhouette or online for free. I mounted some white hardtack underneath it and added a speech bubble that I hand cut in some glitter cardstock from SU!. I already had this little hello laying on my desk since some time. It's a shape I cut a while back with my silhouette from my hand writing. It was perfect to complete my layout. I stitched it on the bubble and on the date card. 


I was pretty happy with that first page, knowing that I didn't want to wait for my kit to come arrive before I start, because sometimes, you just can't wait!

Ok, and then I even started my first week without my seafoam kit!!  lol


One thing I liked very much in my last album (2012) was the small calendars that I had on every page, letting me double check which day was the 2nd for example. So this year I found a free template here and decided it would be perfect for my album. :) I simply circled the days featured this week and stapled it to my date card with the Tim Holz tiny attacher.

Because I didn't have my kit yet, I used some basic square grid cards. Theyr are perfect to write on and to stamp on. The lines make it pretty easy to write straight (even though some people will never write straight, even with lines!) ;) And when my cards arrived, I swapped some of my basic cards that I redid with the seafoam edition cards. It was the case for my One Little Word card. I wanted to write a little bit more so I used a folded acrd. I'm happy that some of the journaling is hidden inside and on the back of the card.

The two bottoms pocket are filled with instagram pictures printed in 2 different sizes (3.5 x 3.5 and 4x4) The 4x4 one (on the left) was staple to a card and I added a simple arrow. And the 3.5x3.5 one was attached with some washi tape to a plain base card. I wish there were more of those in the kit.


I inserted a 12x12 page protector in the middle of the week, like I almost always do because my daughter's artworks simply need to be saved. :) I often jus add a small card and some explanations and that's it.


Sometimes I don't write anything. The artwork speaks for itself.....


One thing I like to do is some work with Photoshop. One the upper picture, I framed 2 3x4 picture onto a 4x6 canvas. A white border around it and some text and that's done. Sometimes I have pictures with no words, but that's rare.... I'll most likely add a little tag to that top right picture. 


Another thing I do is print pictures in a 3x4 format. I often have so many photos I'd like to display in my album that I have to do that. This year I started to write on my pictures with an American Craft photo pen. It's less special than writing with Photoshop, but it works fine.


Here I stapled a journaling card that was on Becky Higgins' website (it's a from Liz Tamanaha. A GREAT designer!) to my instagram picture printed in 4x4. The quality of my Instagram pictures is not the best, but for a project like Project Life, I find that it's just enough. For me this album is more about memories (everyday's little things) than about beautiful and perfect pictures. 


Ok, so that was my first PL week. :) 
I hope you enjoyed it and I hope you'll join me in the revealing on my 51 other weeks reveal. ;)

Thanks so much for being here!
See you soon!!
Marie