Saturday, May 7, 2016

Scrap Gals Guest Post | Happy national Scrapbooking Day

Hello everyone!!

Happy (inter-)National Scrapbooking Day!

If it's your first time on my blog, well hello, I'm very happy to have you here. :)  You'll see that my blog posts are filled with pictures and explanations!

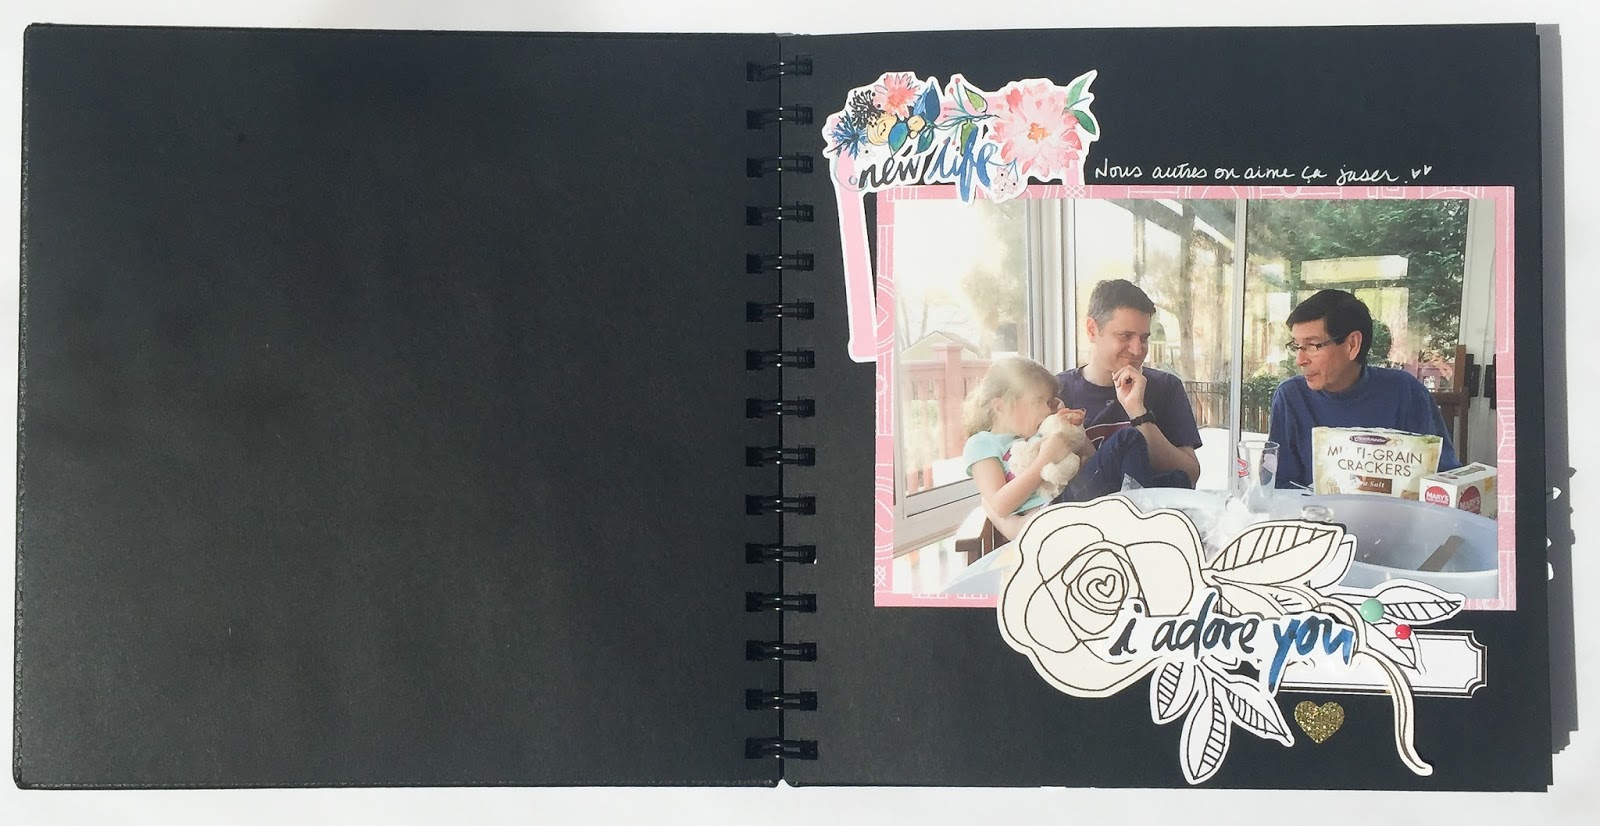
Today I would like to show you a mini album I made for my mom's birthday. We live in 2 different countries and we don't get to see each other often enough so when my parents came last month, it was my mom's birthday and I thought that she would be happy to get a little book about her 2 weeks stay at our house. :)

I wanted the album to be sturdy so as a base I went with a little book I had on hand. I couldn't add pages like in a 3 rings binder but for a small project with a beginning and an end, it was perfect!

When I made the book I had just bought the beautiful Wilna Furstenberg's Spring Collection and I thought they would work perfectly with my project.  I started by printing and cutting lots of flowers with my Silhouette. Now, I know A LOT of you Silhouette owners have never tried the PRINT AND CUT function of your wonderful machine and you don't know what you are missing!!  So today I would love for you to follow these EASY and SIMPLE steps and to try it once and for all!! It's National Scrapbooking Day after all! :)

If you already know how to print and cut, just skip this part and go directly to the album sharing part! :D

Ok, so I assume that if you have a Silhouette,  and if it's out of it's box, you already know how to cut, right? So then you just have to learn how to PRINT. So easy!!!

1. Open your printable document and cut file.


2 Turn on the PRINT guide (it's the icon to the top right of your screen with a page and 4 corners - you see it up here, highlighted in blue)

Then, in the STYLE box you want to select the Type One - Cameo/Portrait. You will see the grey area and the black square + corner lines appear on your document.

YOU'RE HALF WAY THERE! Hang on!


3. Once you have that grey area, you have to place your prints in the middle of your paper so that the image doesn't touch the grey area, like shown above.


4. When that's done, align the black cutting file with the printable as much as you can. When it looks pretty good, right click on the black image and bring it to the back.  You can then adjust the top image so that both shapes fit perfectly.


Just like this:


5. Now you are ready to print. I bring my black cutting guide to the front again (or the image to the back if you prefer) and I delete it (select + hit delete). Then you go to FILE and Print, just as you would print a normal document. You put your cardstock in your PRINTER (not your Silhouette). 


AND YOU MADE IT!!! Your image is printed with the cutting guides around it. You now only need to place your cardstock on your mat, making sure that you align the upper left cornet perfectly in the corner of the mat and you are ready to cut, as you would cut a normal shape.

If you need directions for the cutting part, here they are:

6. So now undo your last action (command or control Z), which was deleting your black cutting shape.  It will be exactly on top of the printed image.


7. Go to the Trace menu (which is the blue and yellow butterfly looking icon), click on "select trace area" and select the whole black image. It will turn yellow.


Once it's selected, uncheck the "high pass filter" box and the whole surface will turn yellow.


Click on "Trace" or "Trace Outer Edge" depending on if you want all the little inside parts cut out.


Delete both the black and the color images or just grab them and pull them to the side of the "work surface".


And finally select the "cut" icon which is the one that looks like a pen. Select your cardstock type and send it to Silhouette. Don't forget to insert your mat with your printed document in the machine first!

See, very easy!! Now, if you think you're going to forget all of this and want to come back to take another peek at the instructions, PIN this post to your favorite board or make a bookmark! :)

Now on to my mini album...

I ended up with 32 pages! yikes!!

Here's the little black book that I had on hand. I found it at Michaels in the clearance section many years ago! Although it's spiral bound and doesn't close properly with all the photos and embellishments I have in there, the faux-leather cover with the stitching details is really beautiful and it looks like pretty sturdy too.  The size of it is about 8x8in.


As an opening, I used a gold foiled label (Pretty Little Studio)  and wrote down a summary of what will be in the book. I added some paint splatters - they are actually acrylic ink from Liquitex - and I definitely should have tested them on a piece of paper before starting using them for the first time (!!) in my album. lol I don't like that big blob of ink at the bottom. This being said, I was on the lookout for white paint/ink that would cover well and this is it!!


On the "real first page" I have the date and place as long as some personal words to my mom.


This teal label  (Pretty Little Studio) goes PERFECTLY with Wilna's flowers.


Behind the colored flowers, you will notice some black and white branches. They are also from Wilna. You can find them here.


I used some foam adhesive to make the words pop a little more.
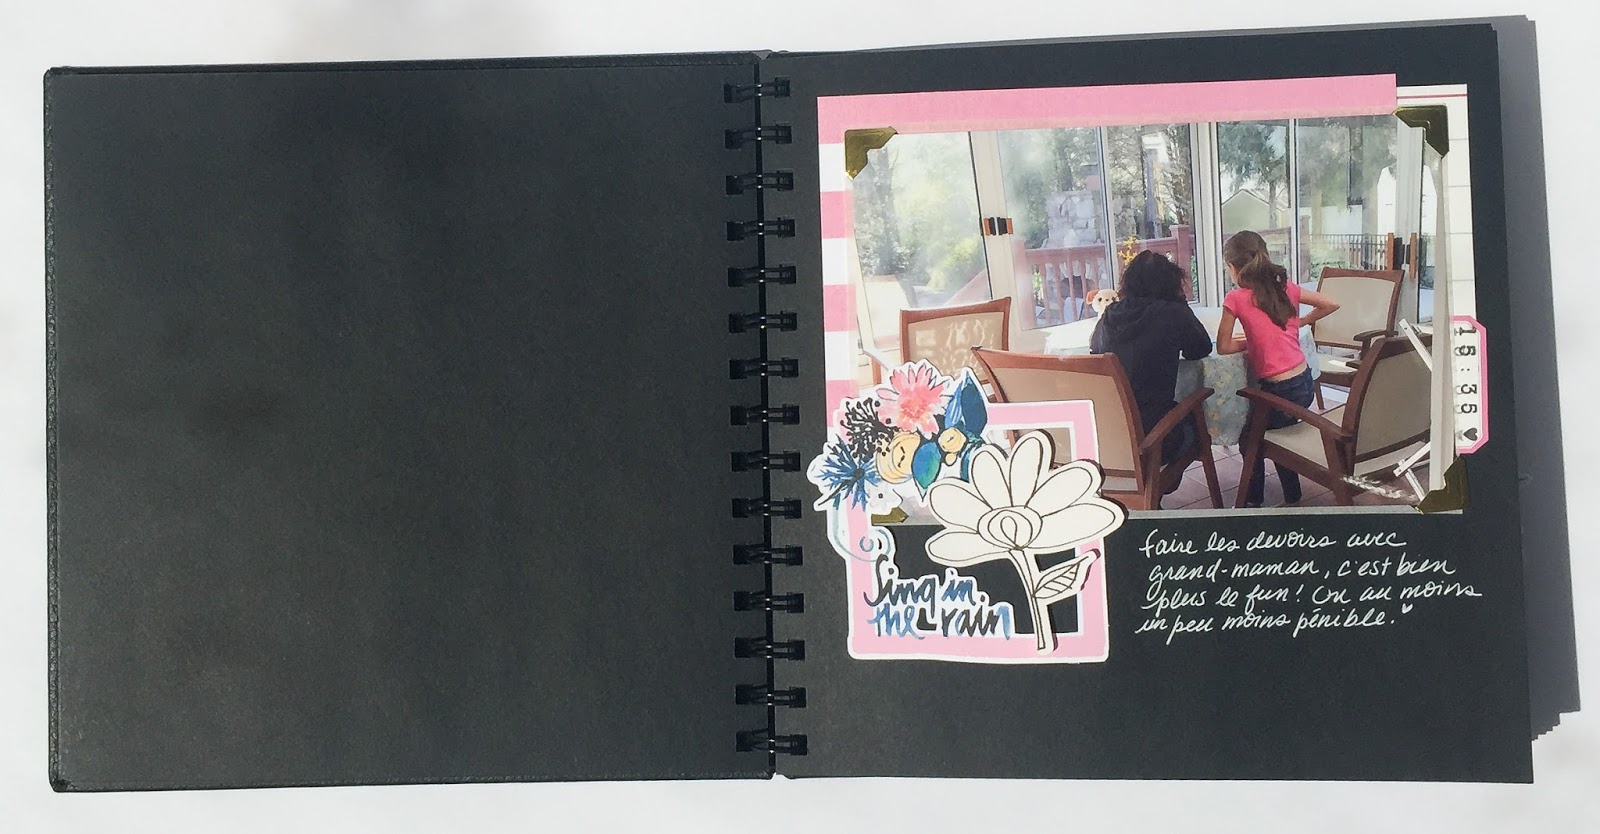

I mainly used Wilna's printable and cut files throughout my whole album but on some pages I also added a little bit of paper and labels.


Here you can see Ali Edward's time stamp in action.


I added some more acrylic ink splatters throughout the album, but not on every page. And not a ton either.


To mix things up I sometimes used photo corners and other times I used patterned papers to ground my photo. Here I used different patterns of Pretty Little Studio Gold mine papers.


I didn't do a double page layout on every page. And it's ok. It gives the reader little breathing room


I found that butterfly die cut in my stash, left from a previous project.


And I finished off the album with one last little note and a die cut. :)


Finally, a couple pages later I added this photo of when by brother came to visit. He left just on the day my parents arrived (so my mom wanted me to include it in the album)


VoilĂ , a quick little album made easy by using many die cuts from the same collection. Also, it helped that I had  an empty book to start with. No messing with a template or pocket pages.

Now, if you are still with me, my challenge to you today would be to use your Silhouette if you have one. If you're a first time user, start with a simple cut, but if you are used to the machine, I invite you to use the print and cut function, following my tutorial. If you don't have a Silhouette, you can still buy any print and cut product (I really really love the ones from Wilna Furstenberg) and print it + cut it by hand. Leave a little white space around the image and enjoy the cutting. :) 

I'd really love to see what my post inspired you to do so please please please tag me on Instagram (I'm MPCAPISTRAN)  if you do share a project!! :D 

Happy National Day again!! 
And thanks for stopping by. 

Marie


Friday, May 6, 2016

Citrus Twist Kits DT | Project Life Sketch

Hey guys!!

How are you?! :) I am still breathing but stressed out as the big move is fast approaching. Squeezing in as much scrapbooking as I can before I leave for 2 months. A girl has her priorities at the right place, right? :)

So today I'm on the Citrus Twist kits blog with a Project life spread and a sketch for you to play along with me. :)

I want to show you a picture or two of my spread here, but I don,t want to redo a whole blog post so I'll just let you head over to the Citrus Twist Kits blogpost for the detail shots if you don't mind.

Here is my spread:


Thanks for coming by and I hop to see you over on the Citrus Twist Kits blog! :)

Have a great National Scrapbooking weekend!!
Come back here tomorrow for a very special blogpost. :D

Marie-Pierre


Tuesday, May 3, 2016

Citrus Twist Kits DT | National Scrapbooking Day

Hello y'all

National Scrapbooking Day is just around the corner and Citrus Twist Kits is celebrating with an Instagram Hop AND a Giveaway!! :) Here is the project I created for the hop. If you would like to participate, please head over to Instagram and from my account you'll be able to visit everybody on the DT, leave each one a comment and be entered in the drawing of 3 25$ CTK Gift certificates!!

On Instagram, follow @mpcapistran

I also have a challenge for you to inspire you and jumpstart your creativity at the end of this post. 

Here's my project created with the gorgeous, gorgeous May 2016 PL kit:


This is the last week of March. My parents were visiting. I thought the products in the kit were just perfect for celebrating spring and people we love.


The embellishments in the kit include epoxy stickers from the Paige Evans collection Fancy Free.


And they also include a pack of Project Life ephemera with silver foil. Friends, we might not be over gold quite yet, but I'm telling you, Silver is the new gold. Be prepared! And it's gorgeous!!


Citrus Twist Kits ALWAYS have the prettiest exclusive embellishments!!! I would take tons of these and could use them up!! Look at the "week" in clear turquoise. So yummy!! And there is a lot of very beautiful subtle yellow in the card which paired with the turquoise is just perfection. I added some stitching and stamping on this card.


From the Fancy Free 6x6 paper pad I was able to punch out several 1" circles with little words on them. Cut in half and stitched along the side of my photos, they are just so pretty.


Lots of cards with room for journaling. I just love it!!  With the kit you also get a sheet of labels that you can cut out. It's my most used products on my Project Life spreads. The labels are perfect to add small details.


Small core hearts. There are 3 kinds of them. This tiny one.


The bigger one with the you burnt in the middle.  And another one that it slightly bigger with an empty center. Really cute and versatile. Here I layered a cork heart over a Project Life embellishment and I added an epoxy sticker (Fancy Free) + I typed Church on a piece of cardstock that I then cut to size (5 church was the name of the restaurant)


Here I typed on vellum and I cut out my journaling into stripes. You can't really see it on this picture but the "capture" in silver foil. Also look at this cute aqua acrylic flower. <3 nbsp="" p="">

Here again a circle that I punched out from a piece of paper + some journaling on a card.  Little hearts make great bullet points :)


Here I played a little bit with the stitching. And I also typed "new bike" on the card before I stitched the word hello.


The small "loving" was cut out of the label sheet. And I typed my journaling in some of the patterned paper included in the kit. I added more half circles.


Sometimes, because my camera doesn't shoot in 4x6, I'm "stuck" with weird format photos that I can,t really crop to a 4x6. What I do is I mat these photos on patterned paper. It's perfect to add a little bit of color to my spread. Paired with an epoxy sticker and the cork heart, it's juts enough to dress up my photo a bit.


And here's another look at the journaling card where I stitched the word sticker "Sweet".

Now, for the NSD week, as inspiration, I have a challenge for you:

Use ONLY products that your really LOVE on your next page and use your handwriting.

Easy enough?? :)
If you play with me, I'd be really happy if you would post a picture to Instagram an tag me in it. And if you have a link to a blog post, leave it here in the comments or on Instagram. I'd love to have a look at what you do.

Have a great National Scrapbooking Week my friends!!!

Marie xo


Friday, April 22, 2016

Citrus Twist Kits DT | Project Life

Hey guys!

Here's the last Project Life spread I made with my Citrus Twist kits April kits.


This week brings us back to mid-March. My brother was visiting us for the weekend since he was in North Carolina for work. We had a lovely weekend. :)

Left page:


We've got to love Project Life. Without this album I would have never printed any pictures of that special weekend. This being said, some would have printed only one photo and call it good, but since I work per event and not by week or by month, I was free to use the whole double pages spread for our 3 days together. :)


When my brother arrived in Charlotte, my husband was at work and my kids were at school. So we went and have lunch just the two of us. I'm telling that this didn't happen since 1st grade of high school. LOL  I brought my brother to our favorite restaurant, a fancy mexican restaurant with terrace. The sun was shining and we could sit outside in t-shirt. My brother arriving from  Quebec, Canada (look how white he is. haha!!), it was really fun.


Later that afternoon, we picked up the girls at the bus stop, my husband arrived from work around 5, we went to my girls' favorite playground.


The girls had lot of fun running around and playing with their uncle and I had fun taking pictures. :) We even managed to fit a little bit of geo-caching in there. :) We then went to eat on a terrace (yay for living in the South), had a beer followed by an ice-cream.


A week after his visit it would have been my brother's 40th birthday so we wanted to celebrate with him. Pat bought a cake (a fruit tart) and candles. This was the 2nd evening already so the girls were not so shy anymore and sat on him for the cake + photo. :)


Second day (notice that my spread is not 100% chronological) we started with a banana birthday muffin looking like a rabbit rear. ;) lol


And we spent the whole morning in the sunroom. Arielle had been wanting to play games with my brother for a long time so they did just that. :) That lead us to talk about how we used to play and do puzzles all the time when we were kids. (We only have one year appart and were always together).


We spent the afternoon at the White Water Center.  It was fun to eat there and look at the people fall in the water, to climb the rope and the net with the girls. My brother is a fan of the outdoors and outdoor activities so he was right in his element. (the fruit cake came that night after eating vegetables and garlic pasta I had made myself. I'm such a great cook! hahaha!!


Before leaving on Sunday, my brother wanted to go to Walmart. Yep, that was his wish. So we had lunch in another of our favorite restaurant, Cafe100, not shown here, and we headed to Walmart. We came out with several things like 2 barking, eating and pooping dogs for the girls and Easter eggs for the school egg hunts.  Great haul! My brother bought a couple of things and later forgot them in our stairs... So much for going to Walmart. I was,t shy and took a picture... not so glorious, but it does the job. ;)


After the Walmart stop, we went back home and it was time for my brother to leave. Traditional (can we say traditional if it's only the second time?) with the girls and I in front of the house and gone he was. Oh, I filmed my one second video of the girls running after the car. :) 

Wow, That was a load of (personal) information!! I wish I could have fit all that in the album. That should be the goal, right? I guess I still have to work on that: balancing in a better way the photos and the journaling.

Talk to you soon guys! Hope you enjoyed the little walk in my personal life. 

Marie

Thursday, April 21, 2016

Citrus Twist Kits DT | Project Life

Hello everyone!

Ready to see some Project Life inspiration?

What I loved about the Citrus Twist kits Project Life kit this month is all the green!!! It was perfect and so fitting for my St-Patrick's day photos. :)


Left page:


I'm happy I could use my favorite embellishment this month (the acetate words) over one of my photos. The transparency of the word lets you superpose things without making it too crowded. I used the "capture" as a title for the page and I used the gold letters to add subtitles. 


Capture the beauty.
Capture the Leprechaun.
Capture Magic
Capture pride.
Capture Harmony (which is the name of our Elf).


 I used the dark green card to place under 2 little drawings I had found in my daughter's book bag.


And I continued with green cards, but this one as lots of room for journaling. I typed with my typewriter and I added some more details with my pen. The little hearts made me think of when we watch a periscope. :)


I used bits of the label sheet to add more journaling and details.


And I didn't have enough letters to spell out Harmony so I just used a golden hear for the bullet point and that's it. 

Right page:


I wanted to make the right page very soft (in contrast to the left page with all these vibrant colors) and very spring looking since spring and flowers in trees are my favorite things at the moment.


So I used two very neutral card and added very little embellishments. 


I used the yellow but still subtle card to back my forsythia photo. 


Isn't simplicity great?


Subtle colors and minimal embellishing. And I called it good. Very happy with how it turned out.

Have a great day friends! And I hope you can get some crafting done today. 

Marie-Pierre