Tuesday, June 16, 2015

Arielle turned 7 - a crafty pool birthday party

Hi everyone!
Salut tout le monde!

If you follow me on Instagram (if you don't you might want to start today ;)) you'll know already that we celebrated Arielle's 7th birthday this weekend and that I have been working this since a week or two. More like, two. :) Arielle wanted a pool party. I gathered some inspiration on Pinterest and intended to do the cake, the invitations, the goodie bags and a cute table. The party went fast and was pretty and fun! I can walk you through the details a little bit.
Si vous me suivez sur Instagram (et si vous ne me suivez pas déjà, vous voulez pet-être commencer à me suivre aujourd'hui! ;)) vous savez déjà qu'on a célébré les 7 ans d'Arielle en fin de semaine et que j'ai travaillé fort sur cette fête! :) Arielle voulait une fête dans notre piscine. J'ai donc rassemblé des idées sur Pinterest pour lui faire un gâteau, des invitations, des sacs cadeaux et une belle table. Le party a passé pas mal vite et on a eu beaucoup de plaisir. Laissez-moi vous montrer quelques détails. 


The invitations
Les invitations


I was inspired by Wilna Furstenberg's project she once made for Dear Lizzy. I used my Silhouette to cut the shape of the popsicles. I used this design. I mounted them on a popsicle stick that I bought at Michaels and I added gold glitter with some tomboy liquid glue.
Pour les inspirations j'ai été inspirée par un projet que Wilna Furstenberg a fait pour Dear Lizzy. J'ai utilisé ma Silhouette Cameo pour découper les popsicles. J'ai utilisé ce design. J'ai ensuite monté mes popsicles sur des bâtons de popsicles que j'ai trouvé chez Michaels et j'ai ajouté des brillants avec de la colle liquide Tombow. 


I mounted every popsicle on a Project life card from my Dear Lizzy kit (I'm happy I could used these cards because, really, I have way too many in my stash!) and on a glitter cardstock I had used with my Silhouette for a previous project.
J'ai monté chaque popsicle sur une carte Project life de Dear Lizzy (je suis contente d'avoir pu trouver une autre utilité à mes cartes parce que j'en ai tellement!) puis sur une retaille de carton pailletté doré restant d'un autre projet fait avec ma Silhouette.


I finished off every card with some stitching with gold thread and some gold sequins. Easy enough.
J'ai terminé chaque carte avec de la couture doré et des paillette dorées. Facile. 


For the inside, I printed the text with my home printer. The Arielle was made using a font called Heartwell that I got in my big Fontastic Bundle at The Hungry Jpeg. I made my word a mask and I layered it over some watercolor that I had in a digital file (one I use to make some Project Life cards from time to time).
J'ai imprimé l'intérieur avec mon imprimante. Pour le gros Arielle rose j'ai utilisé l'écriture Heartwell qui venait dans mon paquet de polices Fontastic Bundle chez The Hungry Jpeg.


Here are the cards all together. The yellow one was for my neighbors because they have 2 little boys who really don't like pink! :)
Voici toutes les cartes réunies. La carte jaune a été faite pour mes voisins. Ils ont deux petits garçons qui n'aiment vraiment pas le rose. :)

The cake
Le gâteau

Maybe some of you know this, I decorate cakes for my girls every year. Sometimes I bake them, but most of the time I don't. This year I didn't. I bought it at Publix and it tasted great!! Not too sweet. When I order it, I order 2 tiers. One 6 inches and one 10 inches. I order them covered with butter cream so it's easy after that to just lay my fondant over it.
Il y en a peut-être parmi vous qui savent que je fais des gâteaux. 2 par année pour mes filles. Parfois je les fais moi-même du début à la fin, mais souvent je les commande et je ne fais que les décorer. C'est ce que j,ai fait cette année. Je l'ai commandé à l'épicerie et c'était un bon choix parce qu'il était vraiment bon! Et je me suis évité pas mal de travail!! Quand je commande mon gâteau je commande un 6 pouces et un 10 pouces et je les fait couvrir de crème au beurre. Comme ça ils sont prêts à être recouvert de fondant.

Arielle likes fondant very much so she always request LOTS of small things on the cake. I usually start a week or two before the birthday and I do a little bit every night.
Arielle adore le fondant et lld me demande toujours de mettre vraiment beaucoup de petites choses en fondant sur le gâteau. Je commence généralement 2 semaines avant la fête et j'en fais un peu chaque soir.

Here are some pictures to show you my process.
Voici quelques photos du processus.

This is the dolphin in progress. I started with white fondant that I colored with very little black food coloring. I shaped it.
Ça ici c'est le dauphin. J'ai commencé avec du fondant blanc que j'ai teint avec un tout petit peu de colorant alimentaire noir. Je lui ai ensuite donné la forme d'un dauphin.


I added a white belly, and some fins, an eye and set it aside to dry. Several days!
J'ai ajouté un petit ventre blanc, des nageoires et des yeux et je l'ai laissé sécher pendant plusieurs jours!


I then colored white fondant in green, pink, blue, orange… And made small pool themed accents.
J'ai ensuite coloré du fondant blanc en vert, rose, jaune, bleu, orange…. et j'ai fait des petits éléments en rapport avec la piscine.


For the inspiration I check on Pinterest. I take little pieces here and there and put them all together to form something different. If you check my Pinterest board you'll be able to see the inspiration for these pieces.
Pour l'inspiration, je regarde sur Pinterest. Je prends des petits morceaux que je vois ici et là et je les mets ensemble pour former quelque chose de différent. Si vous regardez mon tableu Pinterest, je suis sûre que vous allez trouver l'inspiration pour faire ces petites pièces. 


This year, Arielle wanted to help making the cake so one afternoon I sat down with he girls and we created together. I showed her how to make little rubber duckies and she tried her had at a noodle and some flowers, a floaty… We had a good time, except for when the whole bottle of white beads fell on the floor. By the way, I do have some tools to work with while making these figurines. If you'd like to try it, I would suggest you buy a set of tools to make flowers and you'll be good to go. At least to try and get better. Just like I did a couple of years ago.
Cette année, Arielle a voulu m'aider à faire le fondant donc un après-midi je me suis assise avec les filles et je leur ai montrer comment faire un petit canard et elle a fait une nouille, des fleurs, un flotteur… On a passé un beau moment qui s'est terminé par un pot entier de petits billes blanches renversé. Si jamais vous voulez essayer de faire des petits éléments en fondant, je vous conseille de vous munir d'outils de base comme un kit pour faire des fleurs. Ensuite il suffit d'essayer et de se pratiquer. C'est comme ça que j'ai appris.


Here's the finished cake.
Voici le gâteau terminé.


Small little details like these are what people notice when they look at the cake…
Les gens remarquent beaucoup les petits détails comme ceux-ci.


The goodie bags
Les sacs cadeaux

I still had in mind a really cool beach bag made out of cardstock that my friend Sunghee (master of paper!!!) made some years ago and I thought that for this party, it would make for an awesome goodie bag!! So I checked her instructions on her blog and went to town. :)  I made 11 of these!!
Il y a plusieurs années j'avais vu un sac de plage en carton sur le blog do mon amie Sunghee (maître du papier!) et je me suis dit que ce serait parfait pour faire les petits sacs cadeaux. J'en ai fait 11. Chacun m'a pris environ une heure à faire. 


The small watercolor on the front is a pocket. And the ribbon on the top has been sewed because as you see here it wasn't holding much. :)
La petite aquarelle en avant est une petite pochette. J'ai finalement cousu le ruban puisque comme vous pouvez le voir sur la photo, ça ne tenait pas super bien avec de la colle.


Inside the bag I added some girly things. I'm pretty happy with the notebook with the kids monogram. The kids also liked the small pocket mirror and the ceramic owl plate which is the emblem of their school. :)
À l'intérieur du sac j'ai mis des petites affaires de filles trouvées chez Michaels. Je suis super contente du petit livre avec l'initiale de chaque enfant. Les enfants ont beaucoup aimé le petit miroir de poche et la petite assiette en porcelaine en forme de hibou qui est l'effigie de leur école.


For the boys (we had 3 boys) I decided to make a cute Mason jar filled with water themed candies.
Pour les garçons (on en avait 3 d'invités à la fête), j'ai décidé de remplir un pot Mason de bonbons. 


I'm not sure you can see much, but I used jellybeans for the ocean, I added a giant gummy shark and a colorful lollipop. I added a small tag with the names of the kids. And of course, I couldn't give these without giving some to my girls, so Arielle and Maya got a beach bag + a Mason jar.
Je ne sais pas si vous pouvez bien voir, mais j'ai recréé la mer avec des jujubes bleu et blanc et j'ai ajouté un gros requin en jujube et un popsicle multicolor. Évidemment, quand mes filles ont vu ça, elles ont voulu en avoir un pot elles aussi...

The table
La table

After the cake, we went outside and let the kids play in the pool. We wanted to have a water ballon game but all the water balloons we had prepared in the morning had exploded when we came back from lunch. Probably because of the heat. It was close to 100F that day! But really, the pool alone was great. The kids played for 2+ hours without complaining. :)
Après le gâteau on est sorti dehors et on a laissé les enfants jouer dans la piscine. On avait prévu un jeu de ballons d'eau, mais quand on est revenu du dîner on a vu que tous nos ballons d'eau avaient éclaté pendant notre absence. Probablement à cause de la chaleur. Il fait proche 100F. Mais sérieusement, la piscine à elle seule était bien suffisante. Les enfants ont joué pendant plus de 2 heures sans se plaindre une seule fois! :) (party réussi!) ;)


So for when we were outside we installed a table with fruits (grapes, watermelon and strawberries) and chips, pink lemonade and home made sangria! We had a lot of adults at the party. With the pool, I wanted the parents to stay and watch their kids. It worked out great.
À l'extérieur, on a installé une table avec des fruits (fraises, raisins et melon d'eau) et des chips, de la limonade rose et de la sangria maison! On avait beaucoup d'adultes à la fête car avec la piscine, je voulais que les parents restent pour surveiller. Avec la sangria, ça a très bien marché.


After a while I brought some ice pops. I figured that the ones in plastic wrappers would be easier to eat.
Puis à un moment donné, j'ai sorti des Mr. Freeze. Je trouvais que ça se mangeait mieux dans la grosse chaleur que n'importe quel autre popsicle qui aurait fondu partout.


So there you go. It pretty much sums up the party. :)
Hope you enjoyed the pictures and if you want to pin them, go ahead! :)
Alors voilà. C'est un bon résumé du party. :) J'espère que vous avez apprécié les images. Vous pouvez les ajouter à votre Pinterest si le coeur vous en dit. :)

Marie


Tuesday, June 9, 2015

Citrus Twist Kits - Day in the life

Hi everyone!
Salut tout le monde!

Some weeks ago I played along with Ali Edwards in the Day In The Life. The biggest challenge for me is to render it on a layout after the day is done. In fact, I have done the ay in the life many times, but only have it twice in my album (that's sad - I'm thankful though for these 2 times that made it into the album!) Here's the one I made in  December 2009.
Il y a quelques semaines, j'ai participé au Day in the Life avec Ali Edwards. Le pire pour moi quand je fais ce projet, c'est de faire quelque chose avec mes photos une fois que la journée est finie. Quand on fait ce projet, on se retrouve avec BEAUCOUP de photos et ça peut être intimidant. Comment mettre autant de photos sur une page et avoir aussi de la place pour les mots?? Jusqu'à maintenant j'ai souvent participé au Day in the Life, mais il n'y a que 2 fois qui se sont retrouvées dans mon album. La première fois c'était en Décembre 2009.


It was part of the Yesterday and TOday class and it was made easy for me since I could just replicate the design.
Ce projet faisait parti du cours Yesterday and Today alors c'était super facile de juste suivre le design de Ali.

In February 2012 I did this one. And I added it to my Project Life album.
En février 2012 j'ai fait ceci. Et je l,ai ajouté à mon album Project Life.


As you can see, I didn't add any words… Still, the photos alone bring me back to that time and I am thankful I did this photo montage.
Comme vous pouvez le voir, je n'ai pas ajouté aucun mot. Quand même, les photos me parlent et me ramènent en arrière et je suis contente d'avoir ce montage de photos dans mon album.

This year, I envisioned a grid design. With a little bit of explanations. I played with my Citrus Twist Pocket Life Kit. (I had already made 3 PL spreads with my kit but still had lots of beautiful little goodies to play with!) Here's the result:
Cette année, j'ai pensé qu'une grille pourrait m'aider à inclure des photos et des mots. J'ai joué avec mon kit Citrus Twist Pocket Life. (J'avais déjà fait 3 semaines de Project Life, mais il me restait encore beaucoup de belles affaires!!) Voici ce que ça a donné.


Here are some close up shots:
Et voici des gros plans.


As you can see, it's visually pleasing and I have a little notes here and there, but I still want to add a 8.5x11 page right in the middle of this page with more things from the day. For example I printed out one of the MANY head lice letters we received that day (That was a big thing! And thankfully, Arielle got away without lice. Ouf!), I kept my two grocery receipts from Whole Food and Harris Teeter… I want to have them there and I'll probably pair them with lots of journaling. ;)
Comme vous pouvez voir, c'est beau, et surtout je suis contente d'avoir quelques mots. Mais pour moi, ce n'est pas encore assez et je pense ajouter une page 8.5x11 dans le milieu de ces deux pages. J'ai entre autres imprimé une des nombreuses les que j'ai reçu à propos des poux dans la classe d'Arielle. Ca a été une grosse affaire pour moi. J,ai eu vraiment peur qu'Arielle en aie parce que elle et les cheveux, c'est toute une histoire! J'ai aussi gardé mes reçus de caisse des deux épiceries que j'ai visitées cette journée-là. Je vais probablement ajouter aussi beaucoup de texte. ;)

The main thing for me though is that I have 3rd A Day In The Life page in my album. That's very precious, no matter what it looks like.What about you? Did you play along this year? And if so, what did you do with your photos??
Le plus important pour moi est que j'ai maintenant 3 pages Day in the Life dans mon album. Peu importe comment je l'ai fait, je l'ai fait et c'est très précieux. Et vous? Vous avez joué cette année? 

Marie


Friday, June 5, 2015

Citrus Twist Kits - Pocket Life Friday

Hi everyone!
Salut tout le monde!

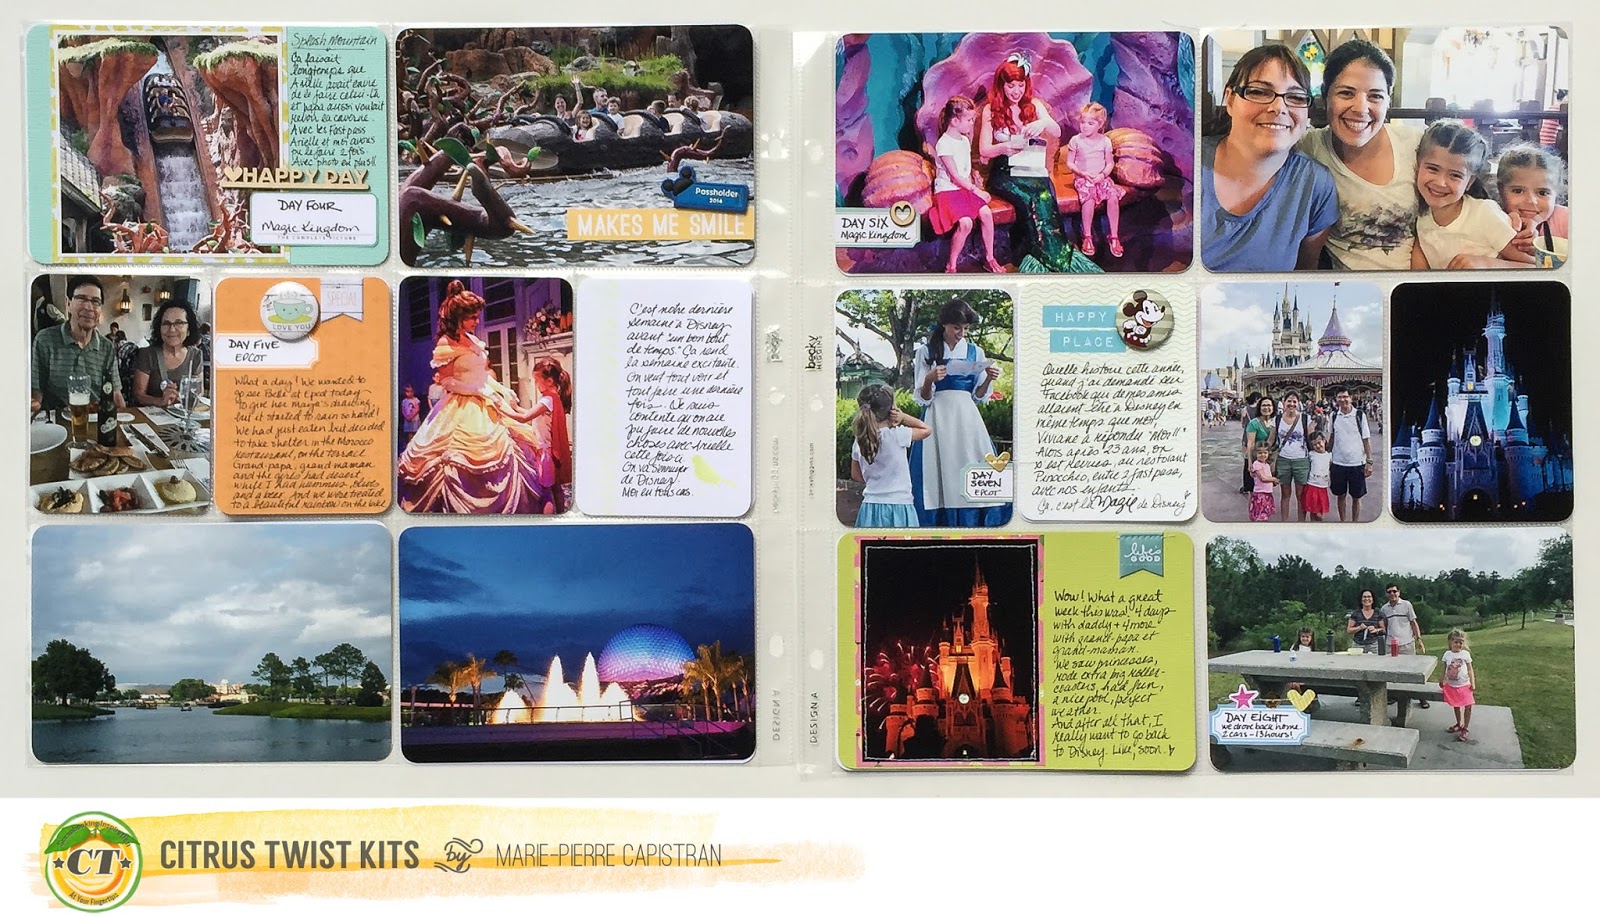
Here's a part of my first post for Citrus Twist Kits!! It's really exciting! A couple of weeks ago I got to use the June Pocket Life Kit in my album. (If you're interested, here's a short post on the Citrus Twist Kits Blog that I made about what I loved most in the June PL kit). What a treat!! The colors were great, the embellishments in the Sprinkle kit were awesome. Lots of little cute things in clear plastic, wood, glitter!! Lots of labels!! Here's what I made with it.
Il y a quelques semaines, je recevais mon premier kit Pocket Life de Citrus Twist Kits!!! (Si vous êtes intéressé à voir le kit et à savoir ce que j'ai le plus aimé dans le kit, vous pouvez aller lire ce billet.) J'ai été gâtée! Les couleurs étaient super vibrantes et joyeuses, il y avait beaucoup de petits embellissements dans le kit d'accompagnement "Sprinkles". Des petits embellissements de plastique clair, des embellissements en bois…beaucoup de petites étiquettes comme je les aime! :) Voici ce que j,ai fait avec mon kit:

(Made with the Main PL Kit only)
(Fait avec le kit PL principal seulement)


Puffy turquoise alpha stickers on a yellow polka dots glassine bag.
Lettres gonflées et turquoises sur un petit sac en vélin à pois jaunes. :)


I've cut out these lemons in one of the patterned paper, overlapped them a bit a stitched through them.
J'ai découpé ces petits citrons dans un des papiers à motifs, je les ai superposé un peu et cousu sur la carte.


When I have a large empty space (or in this cad, it was a busy space that didn't serve the story at all) I like to cover it with a label and use the space to write my journaling.
Quand j,ai un assez grand espace vide sur une photo (dans ce cas-ci, l'espace ne servait en rien mon histoire), j'aime ajouter une petite étiquette et écrire mon histoire.


(Made with the Main PL kit and the Sprinkles kit)
(Fait avec le kit PL principal et le Sprinkles kit)


In the kit, there were no 4x6 Project Life cards but no problem, I used textured cardstock and patterned paper and cut them down to 4x6. To add interest to the cardstock, I mounted my photo on a patterned paper.
Dans le kit il n'y avait pas de cartes Project Life 4x6, mais il y avait des cartes en carton texturé par contre. Je les ai rendue un peu plus intéressante en montant ma photo sur un papier à motifs avant de la monter sur le carton uni. J'ai aussi découpé des feuilles 6x6 en 4x6 pour faire encore plus de cartes à utiliser sous mes photos carrées.


I like to add memorabilia to my pages when possible. Here I cut that little embellishment that was on my bracelet and I used the mini attacher to stick it into place.
J'adore utiliser des petits objets de la vie quand je le peux. Ici j'ai découpé ce petit morceau de plastique d'après mon bracelet et je l'ai fait tenir en place avec une agrafe.


And at Disney, right when you come out of the Magic Kingdom into the parking lot, there's a souvenir shop next to the lost and found. in there I always find vintage Mickey buttons for a really cheap price.
À Disney, dans le magasin de souvenirs qui est juste à côté des objets perdus en sortant de Magic Kingdom, j'ai trouvé des macarons de Mickey pour vraiment pas cher. :)


Here's once again a textured cardstock and a patterned paper under my photo. Not a lot. Just enough to give a little bit of contrast.
Voici encore un exemple de comment j'ai utilisé une carte en carton uni et un morceau de papier à motifs sous ma photo pour ajouter de la couleur et de l'intérêt.


(Made with the main PL kit and the Sprinkles kit)
(Fait avec le kit PL principal et le Sprinkles kit)


A small piece of patterned paper + a label is a good combination!
Une petite bande de papier à motifs et une étiquette font une bonne équipe. :)


Here I mounted my picture directly a piece of patterned paper (leaving a white border around my picture) and I added a small label and some string.
Ici j'ai monté ma photo directement sur un morceau de papier à motifs. J'ai laissé un cadre blanc autour de ma photo. J'ai ajouté une étiquette que j,ai cousue et brochée en place. Elle ne bougera pas celle-là! lol


Here's a little montage of stamped words (I used my new ombre ink from Hero Arts) and word stickers.
Voici un petit montage de mots étampés (avec ma nouvelle encre ombre de Hero Arts) et de mots découpés.

Now, I would like to invite you personally to go check my blog post on the Citrus Twist Kits blog. You'll find 3 more close ups (at the end of the article) as well as 3 sketches. You are invited to use these sketches on your next pocket life layout and to show it to us in the gallery on on the Facebook CTK Fan page to have a chance to win some nice prizes! There will be a sketch on the CTK blog every Friday in you would like to play along with us and maybe win some CTK goodies!!! Oh and while you're over there, you might as well want to leave me a short comment!! :) I'd love that!!
Alors si ça vous tente maintenant, j'aimerais vous inviter personnellement à aller voir mon billet sur le site de Citrus Twist Kits. J'y ai ajouté 3 gros plans et 3 sketchs. Vous pouvez utiliser ces sketchs sur vos prochaines pages et venir nous les montrer dans la gallerie ou la fan page de CTK sur FB et vous pourriez gagner un beau prix! Il y a des nouveaux sketchs et des prix à gagner chaque vendredi. Oh et pendant que vous êtes là-bas, laissez moi un tout petit commentaire. J'aimerais vraiment ça!!! 

Thanks for visiting and have fun creating!!
Merci d'être venu me voir!!!

Marie-Pierre


Monday, June 1, 2015

Crate Paper - The Winner is...

Hi everyone!
Salut tout le monde!

I was so happy this morning when I woke up and saw that I was the 1st place winner of the Mason Jar contest Crate Paper have been hosting the past 2-3 weeks!! I was lucky I got 2 of these cute little jars in my June Citrus Twist Kit!!! The challenge was to make something creative with them. I thought that a picture of the beach would be awesome to pair it with a jar full of "sand" and "sea stars".
J'était tellement heureuse ce matin quand je me suis réveillée et que j'ai vu que j'avais remporté le premier prix au concours de Crate Paper. J'ai été chanceuse, grâce à mon kit de Juin de Citrus Twist Kit, j'avais en ma possession deux petits pots Mason alors j'ai pu participer. Le défi était de les utiliser de façon originale et créative. J'ai décidé de faire un semblant de sable avec des étoiles de mer. Mon voyage à Myrtle Beach a été parfait pour faire une belle photo de plage. 

Here's my layout:
Voici ma page:


Here's my little jar. :) I used patterned paper and glitter cardstock for the stars and I used my BRAND NEW TYPEWRITER (Woohoo!!!) for the little words. :) The golden sequins are representing sand. I wouldn't put real sand on a layout because I read somewhere that micro bugs could end up destroying the paper…
Et voici mon petit pot Mason. :) J'ai utilisé du papier à motifs et du carton pailletté jaune pour les étoiles de mer et j,ai utilisé ma toute nouvelle machine à écrire (Whoohoo!!!!) pour faire les petits mots. Les paillettes dorées remplacent le sable. Je n'utiliserais jamais de sable sur une page parce que j'ai déjà entendu dire que des micro-bibittes qui se trouvent dans le sable pourraient manger le papier. 


It's crazy the beauties you can find in your stash when you look in another way… This time I went through my scrap room looking specifically for Crate Paper products and I remembered that Crate Paper was almost the only brand I could find in Switzerland when I started scrapbooking in 2008, and I loved them!, so I have quite a few old but cute embellishments from them like this beautiful flower and little note chipboard sticker. (these are NOT from 2008 though. lol)
C'est fou tout ce qu'on peut trouver dans notre salle de scrap quand on la regarde différemment. Cette-fois je cherchais des produits de Crate Paper et j'ai été surprise quand je me suis souvenu que la première compagnie qui a sorti du matériel de scrap en Suisse quand j'ai commencé à scrapper en 2008 était Crate Paper. Et j'aimais beaucoup leurs produits.  J'ai donc quelques feuilles de chipboard comme cette joli fleur et le petit "note". 


Here some Maggie Holmes ephemera cuteness, some of my favorite puffy stickers from Studio Calico , lots of layering and white paint + pink Color Shine from Heidi Swapp. This "love this" paper is so versatile. With the pink paint splatters, I love it.
Ici on a des embellissements de Maggie Holmes, mes petits coeurs dorés préférés (de Studio Calico), beaucoup de papier pour créer de l'épaisseur sous ma photo, du color chine rose de Heidi Swapp et des gouttes de peinture blanche. Sur du kraft, les gouttes blanches viennent me chercher! :)


And here's just another view of the little jar. :)
Et voici une autre prise de vue de mon petit pot Mason. :)

THANK YOU so much Crate Paper for choosing my layout as the winner project! You made me very apply!!! And I absolutely loved to play with your products. I find the result quite beautiful. :)
MERCI énormément Crate Paper d'avoir choisi ma page comme projet gagnant du concours! Ca a fait ma journée!!! J'ai adoré jouer avec les produits Crate Paper que j,avais et sincèrement, j'adore le résultat. :)


Marie